• Welcome
  • Health and Wellness
  • Homemaking
  • Recipes
  • Shop
  • Homeschool

This is 39.

July 5, 2025 by Quin Leave a Comment

This is 39. 🎉 I’ve learned that:
•Life only feels short when we waste it.
•A full life is one that involves risk and adventure, not always playing it safe.
•Each day is a fresh new shot at being deeply intentional.
•This is the time to make good choices that support the future.
•This is also a time to realize that even though we may never see the future we imagine, it’s still worth pursuing.
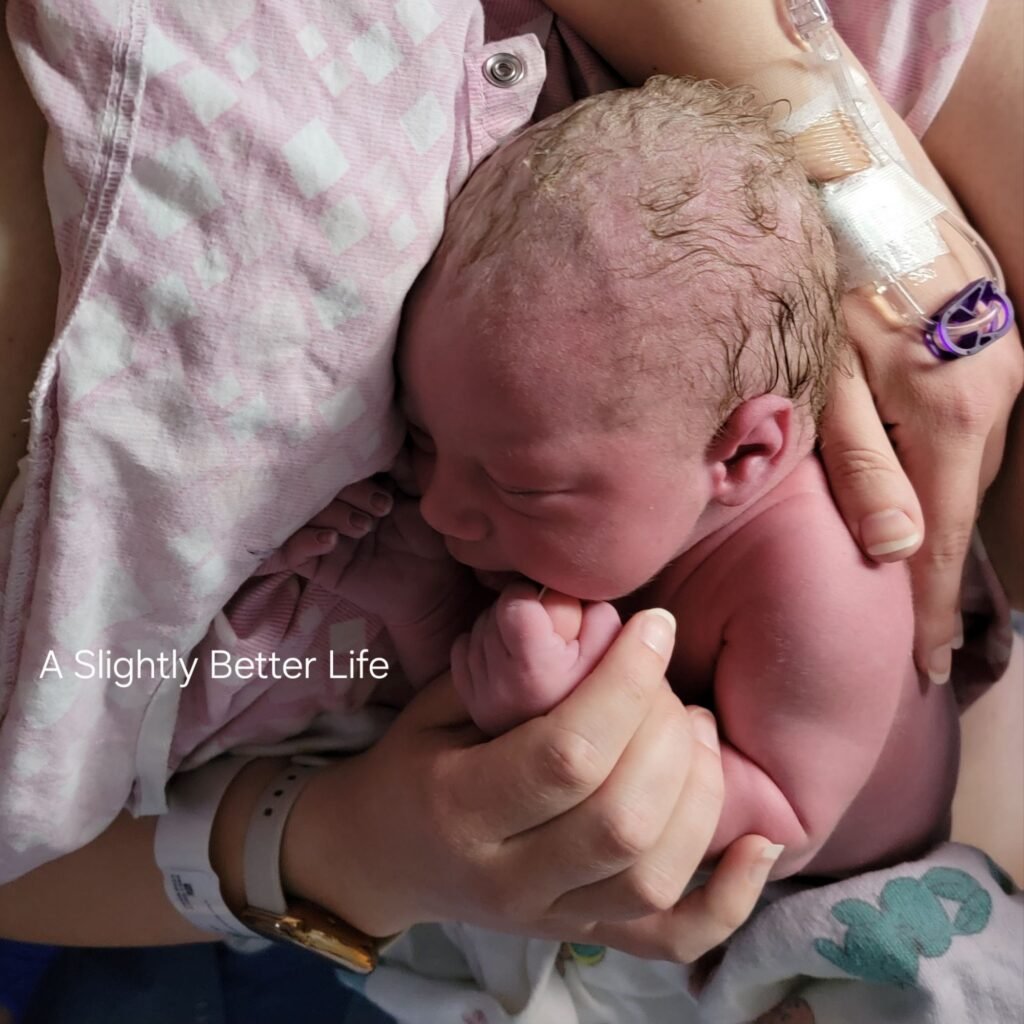
•Life is fragile and beautiful, and while there are bad moments sprinkled in, overall, life is so very good.

Friends, let TODAY be the day that you begin to #celebrateabsolutelyeverything.  Every little interaction and small gesture is all a part of the bigger picture.

God cares deeply about the details of our lives, and we should too. 💕

Filed Under: Celebrate Absolutely Everything Tagged With: Celebrate Absolutely Everything

Gluten-Free Pumpkin Bundt Closet Cake

May 14, 2025 by Quin Leave a Comment

Gluten-Free Pumpkin Bundt Closet Cake. What a name, right?

I came up with this cake for my oldest daughter’s half birthday this year.  She is the baker of our family, so I wanted to give her a break and try whipping something special for her to enjoy. I originally planned on carrot cake, but since we always keep pumpkin in the pantry, I figured if I could nail a pumpkin version, we’d have a go-to cake recipe with ingredients we always have on hand.

Well, everyone RAVED about it—I’m talking crumb-scraping-the-board kind of good. That’s a total mom win! 🙌

The kids and Mr. Awesome didn’t believe I made it from scratch (I’m not the baker in this house), and those who actually saw me make it couldn’t believe how good it turned out. Thanks, I think? 😂

They loved it so much that we’ve made it several times over the last two weeks. I even had others test it out to make sure it wasn’t just beginner’s luck, and now I feel confident enough to share the recipe.

Why “Closet Cake”?

My oldest son came up with the name because I literally hid the cake in our closet until the big half-birthday dinner reveal. The clothes in there smelled like sweet fall spice for a few days!

I did use a store-bought frosting because we found one with minimal ingredients and had it on hand. There is no sense in over-complicating things.

Also, I used my mixing bowl and a kitchen scale to measure everything in grams. I’ve really come to love baking this way—it’s consistent, makes fewer dishes, and everything I’ve baked by weight turns out better. Do you use a scale when you bake? I’ve included standard measurements after each ingredient, for your convivence.

Here are a few handy affiliate/referral links, like to my favorite flour, bundt pan, kitchen scale, and frosting.

Gluten-Free Pumpkin Bundt Closet Cake

Print Recipe Pin Recipe
Ingredients Method Notes

Ingredients
  

  • 1 Can Pumpkin puree 425g
  • 200 grams Granulated sugar 1 cup
  • 100 grams Brown sugar light or dark 1/2 cup
  • 180 grams Neutral oil I like avocado 3/4 cup
  • 4 Eggs
  • 260 grams King Arthur Gluten-Free All-Purpose Flour 2 cups
  • 5 grams Baking soda 1 teaspoon
  • 6 grams Baking powder 1½ teaspoons
  • 3 grams Salt ½ teaspoon
  • 9 grams Cinnamon 1 tablespoon
  • 60 grams OPTIONAL: Water Âź cup

Method
 

  1. Preheat oven to 350°F. Grease a bundt pan thoroughly.
  2. In a large bowl, whisk together pumpkin puree, sugars, oil, and eggs, until smooth.
  3. Next, add the flour, baking soda, baking powder, salt, and cinnamon.
  4. Stir well. Add water if the batter seems very thick.
  5. Pour batter evenly into the prepared bundt pan and smooth the top.
  6. Bake for 50 minutes, or until a skewer comes out clean.
  7. Let cool in the pan for 15 minutes, then invert onto a wire rack to cool completely.

Notes

We have enjoyed this with and without cream cheese frosting (If you don’t make your own, I like the Miss Jones brand from Wal-Mart). The general consensus from everyone we have served it to is that it really does not need the frosting, and the flavor pops better without it.

Filed Under: All The Posts, Recipes

The Story Behind My Son’s Name: A Resurrection Reminder

April 9, 2025 by Quin Leave a Comment

Two years ago, I was preparing to welcome a new life into the world. My due date was April 9th—Easter Sunday. The timing alone felt like a divine appointment after going through a season of grief. As I walked through that pregnancy, I kept reflecting on the significance of Easter: resurrection, renewal, and hope.

During that season, a particular Bible verse stood out to me. It mentioned a colt—a young donkey—tied up, waiting. It was from the story of Jesus’ triumphal entry into Jerusalem:

“Go into the village opposite you, and immediately you will find a donkey tied, and a colt with her. Untie them and bring them to Me.”
—Matthew 21:2 (NKJV)

That verse stirred something in me. The colt wasn’t just a detail—it was part of a prophecy being fulfilled. It symbolized obedience, purpose, and being chosen for something sacred. Even in its youth, the colt carried the King.

The word colt stayed with me, knowing we were looking for a name that started with the letter “C”. I prayed on it, and eventually the name Colter came to mind. It felt strong and gentle all at once. We didn’t know prior to his birth if we’d have a little girl or boy, and we never did settle on a girl’s name

Colt was a name we considered 6 years prior for another child. In my heart, I knew I was meant to have a son named Colt, but when the day came to name that child, Colt didn’t feel right. For a couple of years, I wondered why I had such a strong tie to the name that we never used. I thought maybe someday it would fall to a future grandchild, or a puppy- ha!, since I thought I’d never get to carry another child in my womb.

I praise God that I did get to know the depths of pregnancy and nurturing a newborn again.

This name carries the memory of Easter, of God’s promises, hope after hurt, and of the quiet, powerful ways He uses even the smallest among us for His glory.

So, when my baby boy arrived— 3 days before Easter just as God knew He would, in the most beautiful way, wrapped in love, joy, and peace—I knew without a doubt: his name would be Colter (his brothers names end in “er”.

I’m reminded of that Easter Sunday when we took our 3-day-old baby boy and family to a church so packed full that we watched the service from the church’s basement on a projector. The hope of resurrection, and the tender ways God weaves meaning into our lives.

Colter’s name is more than just a name—it’s a testimony.

If you’re in a season of waiting or walking through something hard, I want to encourage you: hold on to hope. Just like that colt, seemingly unnoticed and tied up, God sees you. He has a purpose for your life that is greater than you can imagine. He can bring beauty out of waiting, joy from sorrow, and life from what feels broken. Easter reminds us that with God, nothing and no one, is ever truly lost—only being prepared for something greater.

Filed Under: All The Posts, Encouragement, Parenting Tagged With: Encouragement, Parenting

Jesus Loves You (and He Hears You!)

March 13, 2025 by Quin Leave a Comment


“Jesus Loves You.”

Those three little words, whispered from a tiny voice, stopped me in my tracks this morning.  Sweet little Colter was standing at the hallway gate – you know, the one we put up to keep this little one out of the homeschool while his older siblings do their work?  And wouldn’t you know it, the gate was open.

Now, on the other side of that gate was a land of pure toddler temptation.  The computer, the markers, the toys, the books, the math manipulatives, the board games – a whole world of fun just waiting to be explored!  I could practically see the wheels turning in his little head.  He knew he wasn’t supposed to go in there. We tell him, many times a week, that the homeschool room is for when we’re all working together, he isn’t to go alone.

And then, I heard it.  “Jesus Loves You.”  He said it to himself, almost like a little reminder.  And just like that, he turned around and toddled back to me.

It was such a simple moment, but it filled my momma heart to overflowing.

As homeschool moms, we pour so much into our kids. We teach them about God, about right and wrong, about listening to that still, small voice inside.!

We pray that those seeds we plant will take root and grow.  Sometimes, in the midst of the chaos and sibling squabbling, the laundry, the housework, and the never-ending lessons we get to teach, we wonder if it’s really sinking in.

Then, you see a moment like this.  A moment where a little boy, faced with temptation, chooses to listen to that gentle nudge.  A moment where the words “Jesus Loves You” become a guiding light.

It’s a reminder that even when we can’t see it, God is working in their hearts.

The lessons we teach and the prayers we pray are not falling on deaf ears.  They’re being stored up, like treasures, ready to be called upon when needed.

It makes me think of the Holy Spirit, that gentle guide who whispers to us, reminding us of God’s love and leading us down the right path.  Just like Colter heard that little whisper, our children hear it too, and it gives me such hope!  Hope that even when they’re grown and facing bigger challenges, they’ll remember those simple truths we’ve taught them.  Hope that they’ll always turn to Jesus, even when the world is pulling them in another direction.

It’s a reminder to me, too, to keep planting those seeds. To keep speaking truth and love into their lives.

You never know when a little “Jesus Loves You” will make all the difference.  And isn’t that what we all want, to raise children who love God and walk in His ways?

What little moments have reminded you that God is at work in your children’s hearts? I’d love to hear about them in the comments!

Filed Under: Encouragement, Parenting Tagged With: Encouragement, Parenting

A Slightly Better Pea Salad – 7 Ingredients or Less

January 21, 2025 by Quin Leave a Comment


As a homemaker and momma of five, I’m always looking for simple, nourishing recipes that my family will enjoy. Over the years, I’ve learned to tweak old favorites into healthier, slightly better versions. This pea salad is one of those recipes—a fresh and flavorful alternative to the mayo-heavy pea salads I grew up with (and have fond memories of, but my body doesn’t agree with now).

Instead of mayonnaise and cheap oils, I use avocado oil for a lighter, healthier touch. The sweet crunch of peas, the smoky saltiness of bacon, and the zing from red onions all come together beautifully in this dish. I like to add just a drizzle of maple syrup for a subtle sweetness that takes it over the top!

The best part? This recipe is flexible. I don’t measure anything, and it always turns out delicious. Here’s how I make it: 

Ingredients
– Frozen peas: I use 4 pounds for our family, which gives us plenty for dinner and leftovers. 
– Bacon: Cooked and diced into bite-sized pieces.
– Red onion: Diced small for just the right amount of zing. 
– Avocado oil: Drizzled for a creamy texture without the heaviness of mayo. 
– Salt and pepper: To taste. 
– Maple syrup: A little drizzle to sweeten things up. 

Instructions
1. Thaw and rinse the frozen peas, then drain well.
2. Cook and dice the bacon. (Tip: Cook extra for snacking—it’s impossible not to!) 
3. Dice the red onion into small pieces. 
4. In a large bowl, combine the peas, bacon, and onion.
5. Drizzle with avocado oil, season with salt and pepper, and add just a touch of maple syrup.
6. Gently toss until everything is evenly coated.

Why I Love This Recipe:
This pea salad is quick to make, kid-friendly, and perfect for potlucks or family dinners. It’s also versatile—feel free to add shredded cheese, nuts, or even fresh herbs if you like. 

It’s a slightly better choice for those looking to avoid processed ingredients while still enjoying a creamy, delicious side dish. I hope your family loves it as much as mine does!

If you give this recipe a try, let me know how it turns out in the comments, or tag me if you share a picture online. I’d love to hear about any tweaks or additions you make!

With love, 
Quincey
A Slightly Better Wife

Gluten & Dairy Free Pea Salad – 7 Ingredients or Less

Print Recipe
Ingredients Method

Ingredients
  

  • – Frozen peas: I use 4 pounds for our family which gives us plenty for dinner and leftovers.
  • – Bacon: Cooked and diced into bite-sized pieces.
  • – Red onion: Diced small for just the right amount of zing.
  • – Avocado oil: Drizzled for a creamy texture without the heaviness of mayo.
  • – Salt and pepper: To taste.
  • – Maple syrup: A little drizzle to sweeten things up.

Method
 

  1. Thaw and rinse the frozen peas, then drain well.
  2. Cook and dice the bacon. (Tip: Cook extra for snacking—it’s impossible not to!)
  3. Dice the red onion into small pieces.
  4. In a large bowl, combine the peas, bacon, and onion.
  5. Drizzle with avocado oil, season with salt and pepper, and add just a touch of maple syrup.
  6. Gently toss until everything is evenly coated.

Filed Under: Recipes

30 Benefits of Red Light Therapy

November 8, 2024 by Quin Leave a Comment

As a Christian homemaker I strive to care for myself and our family in a way that honors God.

In today’s fast-paced world, it can be challenging to find ways to maintain our health and beauty. Red light therapy, a non-invasive technique that harnesses the power of specific wavelengths of light, offers a natural and effective solution for various skincare concerns.

This post contains affiliate links

A God-Given Gift: The Power of Light

Light is a powerful force in the universe, and God created it to illuminate our world. Red light therapy, when used wisely and prayerfully, can be a tool to enhance our physical well-being and reflect God’s beauty.

Benefits of Red Light Therapy for Christian Homemakers:

  • Reduced Inflammation: Red light therapy can help soothe irritated skin, making it ideal for conditions like acne, eczema, and psoriasis.
  • Enhanced Skin Rejuvenation: Increased collagen production can lead to firmer, more youthful-looking skin.
  • Faster Wound Healing: Red light therapy can accelerate the healing process of cuts, burns, and other skin injuries.
  • Pain Relief: This therapy can help alleviate pain associated with conditions like arthritis and muscle soreness.

The Lumebox: A Modern-Day Miracle

The Lumebox is a cutting-edge red light therapy device. This powerful tool is easy to work into your daily routine. With its portable design and customizable settings between RED and NIR light, the Lumebox allows you to tailor your treatments to your specific needs.

Incorporating Red Light Therapy into Your Christian Homemaking Routine:

To maximize the benefits of red light therapy, consider the following tips:

  • Pray Before Each Session: Ask God to bless your treatment and guide you in using this tool wisely.
  • Use It Consistently: Regular use is key to achieving optimal results.
  • Protect Your Eyes: Wear the included protective eyewear during treatment, especially around your face.
  • Trust in God’s Timing: While you may notice improvements relatively quickly (so impressed with this), be patient and trust in God’s perfect timing for healing those ailments that have been there a while.

By incorporating red light therapy into your daily routine, you can experience a radiant glow, smoother skin, and a boost in overall well-being.

Remember, as Christian homemakers, our goal is to honor God in all that we do. By using red light therapy wisely and prayerfully, we can embrace modern technology while maintaining our faith and values.

None of this is medical advice, just our opinions and experiences. My husband used red light therapy through our chiropractor to heal a shoulder injury that we thought for sure would need rotator cuff surgery. Now of course that is a more extreme case, but I’m telling you this because I want you to know how powerful red light can be. Our 17 year old son uses red light when he has finished big mowing or landscaping jobs, to ease muscle tension and soreness.’

I love using red light all the time, it just makes me feel good! I started using the Lumebox to help with plantar fasciitis, and continue to use it while I’m working through physical therapy. I use it to aid wound healing, reduce the mom belly, and to boost my mood. Ohhh that mood boost, seriously, this is so good!

30 Benefits of Red Light Therapy

Here’s a comprehensive list of 30 benefits that could be associated with red light therapy:

  1. Reduced Inflammation: Alleviates redness and swelling.
  2. Accelerated Wound Healing: Promotes faster recovery from cuts, burns, and surgical wounds.
  3. Enhanced Collagen Production: Boosts collagen synthesis, leading to firmer, more youthful skin.
  4. Improved Skin Texture and Tone: Reduces fine lines, wrinkles, and uneven skin tone.
  5. Pain Relief: Alleviates muscle and joint pain, including arthritis and fibromyalgia.
  6. Increased Blood Circulation: Improves blood flow to tissues, promoting healing and reducing inflammation.
  7. Boosted Cellular Energy: Stimulates cellular metabolism, leading to increased energy production.
  8. Enhanced Hair Growth: Promotes hair follicle health and stimulates hair growth.
  9. Reduced Acne: Helps to reduce acne breakouts by killing bacteria and reducing inflammation.
  10. Improved Mood: May help alleviate symptoms of depression and anxiety.
  11. Faster Muscle Recovery: Reduces muscle soreness and fatigue after workouts.
  12. Enhanced Athletic Performance: Improves endurance and reduces recovery time between training sessions.
  13. Boosted Immune System: May help strengthen the immune system and fight off infections.
  14. Improved Sleep Quality: May help regulate sleep patterns and promote restful sleep.
  15. Reduced Oxidative Stress: Protects cells from damage caused by free radicals.
  16. Increased Lymphatic Drainage: Improves lymphatic circulation, reducing swelling and promoting detoxification.
  17. Enhanced Brain Function: May improve cognitive function, memory, and focus.
  18. Reduced Migraine Frequency and Severity: May help alleviate migraine symptoms.
  19. Improved Vision: May help improve eye health and reduce symptoms of eye strain.
  20. Reduced Eczema Symptoms: May help reduce the severity of eczema flares.
  21. Enhanced Skin Hydration: Improves skin moisture levels, leading to softer, smoother skin.
  22. Reduced Psoriasis Symptoms: May help reduce the severity of psoriasis plaques.
  23. Improved Thyroid Function: May help regulate thyroid hormone levels.
  24. Enhanced Hormone Balance: May help balance hormone levels, especially in women.
  25. Reduced Cellulite: May help reduce the appearance of cellulite.
  26. Increased Energy Levels: Boosts overall energy levels and reduces fatigue.
  27. Improved Joint Health: Reduces joint stiffness and pain.
  28. Enhanced Skin Elasticity: Improves skin elasticity, reducing the appearance of sagging skin.
  29. Reduced Sun Damage: May help repair sun-damaged skin.
  30. Improved Overall Well-being: Promotes a sense of relaxation and well-being.

Please note that while these are potential benefits, individual results may vary. It’s always best to consult with a healthcare professional before starting any new treatment.

You can read more about the Lumebox on their website by clicking my affiliate link here.

Filed Under: Health and Wellness

How to Make a Slightly Better Gluten-Free Loaf of Bread in a Zojirushi PDC20BA

October 21, 2024 by Quin Leave a Comment

After much research and consideration, and listing a few unused items on Facebook Marketplace, I bought the best bread machine for our family a few years ago. I have been making a few loaves a week ever since.

This post will contain affiliate links.


It’s the Zojirushi PDC20BA->

I learned early on that to get the most consistent loaves each time I needed to ditch the measuring cups and use a kitchen scale.


I started with the recipe from Zojirushi and tweaked it for our family based on our intolerances and preferences.

I use:
400 g water

3 duck eggs (as a few of us are intolerant to chicken eggs)

15 g Vinegar or Apple Cider Vinegar (Aldi)

36g Olive or Avocado Oil (Aldi)

40g Honey, local when possible

320 g Potato or Corn Starch –> https://www.vitacost.com/vitacost-potato-starch-flour-non-gmo-and-gluten-free-32-oz-2-lbs-907-g-2

228g Rice Flour –> https://www.vitacost.com/bobs-red-mill-white-rice-flour-24-oz-resealable-pouch

8g Xanthan Gum –> https://www.vitacost.com/now-foods-xanthan-gum

8g Salt –> https://www.vitacost.com/redmond-real-salt-ancient-sea-salt-fine

9g Yeast –> https://www.walmart.com/ip/Fleischmann-s-Active-Dry-Yeast-4-Oz/10306743?athbdg=L1600


Loaf yield for each store-bought ingredient

(I wish I had known this when I started before I bought a massive supply of some items and only a few of others):
1 33.8oz bottle ACV=66 loaves
1 16.9oz bottle Olive Oil= 13.88 loaves
1 32oz box of Potato Starch =2.83 loaves
1 24ox bag of Rice Flour =2.98 loaves
1 6oz bottle of Xanthan Gum= 21.25 loaves
1 26oz bag of Salt= 98.26 loaves
1 jar of Yeast= 12.55 loaves

I bought a big supply of Xanthan Gum before I realized one bottle could make 21 loaves. Lesson learned!


I like that this machine makes substantial-sized loaves of bread that can often serve our large family for at least 2 meals. Cutting the bread slices in half makes a sandwich that is just right for the little ones.

I have not figured out the cost per loaf for 2024 (many items have increased in price, so I’ll do this soon and update here), but for 2022:
A loaf with potato starch, olive oil, & duck eggs=$5.14
A loaf with corn starch, olive oil, and duck eggs=$5.63

Happy Baking! If you have any questions please send me a DM over on Instagram.

Gluten Free Bread

Print Recipe
Ingredients

Ingredients
  

  • 400 g water
  • 3 duck eggs as a few of us are intolerant to chicken eggs
  • 15 g Vinegar or Apple Cider Vinegar Aldi
  • 36 g Olive or Avocado Oil Aldi
  • 40 g Honey local when possible
  • 320 g Potato or Corn Starch –> https://www.vitacost.com/vitacost-potato-starch-flour-non-gmo-and-gluten-free-32-oz-2-lbs-907-g-2
  • 228 g Rice Flour –> https://www.vitacost.com/bobs-red-mill-white-rice-flour-24-oz-resealable-pouch
  • 8 g Xanthan Gum –> https://www.vitacost.com/now-foods-xanthan-gum
  • 8 g Salt –> https://www.vitacost.com/redmond-real-salt-ancient-sea-salt-fine
  • 9 g Yeast –> https://www.walmart.com/ip/Fleischmann-s-Active-Dry-Yeast-4-Oz/10306743?athbdg=L1600

Filed Under: Homemaking, Recipes Tagged With: Homemaking

Overcoming Mold Illness: My Story + A Guide to My Recovery

August 16, 2024 by Quin Leave a Comment

What I’m going to share today, some may say is reckless advice, some may say it’s too much, others may say the actions we took at the time weren’t enough.  It is important that when exploring the option of mold causing your symptoms (assuming that is what led you here) you remember that by God’s design, we are all individuals who are biologically unique with different experiences and toxic loads based on our genetics, our environment, our detox pathways, and more.

What I experienced or what worked for my family and me in terms of healing, supplements, remediation, and recovery, may not be the same path that would work for you.  You may need to do more, you may need to do less, or you may need something different altogether.

It is my prayer that while you are here you will glean what you need to, be encouraged, and gain the strength to be physically able to do what you can where you are right now, and that the Holy Spirit will guide you on your healing journey.  I know this path can feel heavy sometimes, but there is hope for healing. I pray God will send a community to love on you and help pull you through this to the other side where you too, may help others on their path.

Oh, and because it was helpful for me to not feel so ashamed by what I was going through, I want to start by letting you know I read a report that said: “around 70% of U.S. homes contain a certain level of mold”. That statistic shocked me.  Some sources say 47%, and some say 80% of buildings in America contain mold, you get the point though. It’s not just you, it doesn’t mean you aren’t a good housekeeper, mold just goes where it wants and does its thing. I kept a very tidy home, and when we discovered mold was the culprit behind my symptoms I struggled with feeling “gross” and “dumb” that we had mold in our home and I didn’t even know it. Ours was hidden behind a wall and in duct work, it was not visible to us. Some people begin to get mold sick from their work environment.

Let’s do this, it’s time to dive into where it all started, back in the fall of 2020. Yes, if you recall, this was when the world was in what I refer to as “full crazy” mode. That’s when I began to get sick.  It came on quickly and I assumed it was a cold or strep throat, I even took a pregnancy test thinking maybe my nausea was related to a surprise baby blessing. That was not the case.

What I went through was tough to diagnose, as it was a trifecta that led me into a full toxic burden:

1. An allergic reaction to dental anesthesia after a filling.

2. New (toxic) acoustic ceiling tiles being installed in our basement that began to shed fiberglass.

Lastly, and the toughest to diagnose by regular doctors:

3. Mold illness triggered by an improperly installed HVAC system and poor or non-existent caulking on the outside of our home from service workers ranging from electricians to plumbers when our house was built. Action Item: Go check the caulking on the outside of your home if you haven’t lately. Check around any tubes and wires heading into the home, around doors and windows, and anywhere else moisture may be creeping in.

My personal body burden of toxins was maxed out and symptoms began to present themselves.  The most debilitating, although it wasn’t the first sign, was nausea and anxiety. I feel things intensely, I always have. Throughout adulthood, my go-to emotions had been without a doubt happiness and joy, but through this illness, those had been replaced with fear and gloom.  It was unexplainable to me how suddenly my brain began to go to the “worst-case scenario” for every big and little event that crossed my mind.

My heart rate was often opposite of what it should’ve been, racing while sitting in a chair, dropping to where I would nearly pass out while vacuuming or exerting myself physically. I would look at my watch and be in disbelief at what was happening.  It confirmed that what I had been thinking and feeling wasn’t all in my head.  This was real, this was a measurable stat.

I had the most intense pains in my back that I thought maybe was my gallbladder (remember I was in a constant state of worry and trying to figure out why I wasn’t feeling well). I would curl my body up on the floor at my husband’s feet under his desk while he worked from home and cry.  We would both cry during this season of life. The whole house cried, our extended family cried, our friends cried and prayed with us.  This was so hard to navigate and every time I went online for help I was sent down an unproductive rabbit hole that left me feeling more helpless and hopeless.

My body was so ramped up and I was stuck in flight mode, my bowels were loose for weeks, and my bowel movements during this time were bright almost neon yellow, indicating there was some serious problem.

I had phlegm in my throat and a little cough every morning when I woke up.  I had tightness in my chest and experienced what I imagined asthma attacks to feel like.  I had an overwhelming amount of nausea and anxiety along with the tightness that would come in deep waves and take over my body, and go away for just long enough for me to think I was maybe okay, but then it would hit again. My eyes were scratchy and dry.

I lost weight so quickly that I hardly recognized myself in the mirror and my clothing no longer fit well, it just hung on my frame.

A few weeks into my illness, before I had a diagnosis, my husband would often find me in bed, sometimes convulsing.  It was terrifying to be laying there, unable to control my body, and then see my little kids peek their heads around the corner to check on me.  Their eyes filled with fear, but they smiled and prayed, believing I would get better. Their hope inspired me to fight harder.

I prayed every day that God would put before my eyes what I needed for healing, and graciously, He did! Oh, how I want to tell you all the amazing ways God worked through this time in our lives.  It was messy, but it was one of those beautiful messes where He gets all the glory.

I went to an ER that didn’t meet my needs, rather suggesting I get talk therapy.  What?!  I have nothing against therapy and think it can be very helpful, but the doctor did not examine me and made a quick decision within minutes of me being in their care and sent a nurse back in to deliver the news, refusing to give me a proper exam. Remember, the world was in a place of social distancing and full of fear.

Our primary care doctor at the time squeezed me in within a day and had so much compassion for what I was going through, but all of my labs were within the “normal” range, and my EKG came back good in her office.  I later learned this is common when dealing with mold.  She predicted this was like a drug reaction from the dental anesthesia, essentially I was “high” and couldn’t come down.  She suggested I drink ‘a lot of water’ to flush out my system and to take it easy.

When I still wasn’t better within another week or so, I cried to my parents and told them I loved them, but I didn’t think I was going to make it.  That makes me cry just typing this out and looking back on what I felt like during that phone call. I knew of one local functional medicine doctor that I thought, through my prayers, may hold the answer that I needed to unlock true healing within my body.  Her hourly rate + deposit was nearly in line with my husband’s weekly take-home pay.  My dad told me to make the appointment and he would pay the deposit I needed to be seen.  God bless him. If he had never offered that, I don’t think I would be here today.

That doctor was a godly woman who was an absolute wealth of knowledge.  She had currently been going through training to diagnose and treat patients with mold illness.  I didn’t know this when I made the appointment, and she didn’t know what was wrong with me when she took my appointment.  Only God could orchestrate that.

Over a few video appointments, we worked to form a plan, which I will explain more of in a bit. She ended each appointment with a prayer, and I felt so at peace each time.

Mold illness, a subcategory of Chronic Inflammatory Response Syndrome (CIRS), can be a debilitating condition, like it was in my case. It occurs when we are exposed to harmful mycotoxins produced by mold. While it can be challenging, recovery is possible with the right approach.

Disclaimer: This information is intended for general knowledge and informational purposes only, and does not constitute medical advice. Always consult a qualified healthcare professional for any health concerns or before making significant changes to your current treatment plan.  If your Western Medicine doctors do not understand mold illness and you suspect this is what you have, seek out a different provider, and ask around. Locally, I only found education and healing from a functional medicine doctor.

Understanding Mold Illness

Mold illness can manifest in a variety of symptoms, including, but not at all limited to:

  • fatigue, brain fog, headaches, irritability,
  • respiratory issues, shortness of breath, chronic cough, sinus congestion,
  • migraines, rashes, palpitations, hallucinations, Alzheimer’s dementia,
  • muscle aches, joint pain, digestive problems, food intolerances,
  • and often, symptoms that mimic anxiety or depression.
  • I also had sensitivity to EMFs and found relief while wearing a Harmoni Pendant (yes, the very ones that I thought were some kind of woo-woo hoax. I was wrong).

I think that it’s crucial to recognize that anxiety and depression can be side effects of mold illness or toxins in your environment. Many people have been misdiagnosed with these mental health conditions when the root cause was toxic mold exposure.  My husband, who is the most gentle and kind soul, experienced what is referred to in the mold groups as “mold rage”.  His frustrations were high and patience thin, and not just because of the fear of what was happening to me, and needing to take on so much more responsibility and provide for our family financially and physically.

Key Steps to Recovery- Action Steps

  1. Remove Mold Exposure:
  • Identify the source: Conduct a thorough inspection of your home or workplace for mold growth.  Now you may not always see it, as sometimes, like in our case it was hidden within a wall and ductwork. It can be in the drain pain under a refrigerator, around windows where moisture can accumulate with temperature changes, under the threshold of an exterior door, behind a toilet or shower, in a crawl space, an attic, etc.

Try this: Remove yourself from the mold, and leave the home for a couple of days if you can, or take a full day away to spend time outdoors. Do you feel better?  That is a sign something in your environment could be the culprit (provided you stay somewhere mold-free, many people go camping to spend time outdoors). Sometimes it is mold in a work environment that is the problem and symptoms seem to lessen or disappear when you get an extended holiday.

  • Quality testing: If you do not have visible mold, consider doing an ERMI test.  This company will send you a Swiffer to dust your home with, once it is loaded with dust you place it in a baggie and send it back.  They will evaluate the dust in their lab and send you a report with their findings.  From there you will know what kind of mold you are working with and begin to make a remediation plan.

Please note: Air quality sample tests, and tape samples, in my experience and from what I have heard from others on their journey, are not an effective way to test for mold, especially if you are already having symptoms.  I know an ERMI is usually more expensive than the other routes, but it is an effective test covering 36 different species of mold.

  • Professional remediation: If necessary, hire a reputable mold remediation specialist to remove the mold safely and effectively.  Due to where ours was located we hired a duct cleaning company who was also able to sanitize our home the same week they cleaned our ductwork.  During the sanitization process, we had to be out of our home for 24 hours.  Leaving for that little bit of time I began to feel better, and getting back into our home after it had been sanitized I felt much better as well.
  • Declutter and clean: I know, this step can seem like a lot, especially when you are feeling ill.  I am so sorry, there is just no way around this though.  Do not skip this.  Call in help if you need to.  Work in small pockets of time as you are able. Remove excess items, especially porous materials like paper and fabric. Regular cleaning, including vacuuming, washing curtains, and dusting, can help reduce mold spores in any home.  In most cases, things like glass and metal can easily be cleaned.  Furniture cleaning or disposal will depend on how ill you are, and how you feel around it.  Don’t forget to vacuum above cabinets as horizontal surfaces hold a lot of dust, and mold loves to hang out on dust.
  • Mold-sniffing dog: Consider hiring a mold-sniffing dog to identify hidden mold sources.  We did this and I am so glad we did. Through this, we were able to pinpoint specific problem spots, rather than blindly cutting into walls and guessing where the mold problem may be, which could have potentially made things a lot worse and cost more than necessary.

I want to be transparent that the steps it took to identify where we had mold, the doctors visits, and the remediation cost us so much financially, that we had to take out a loan from the bank.  That hurt after pouring so much into paying down our mortgage so we could eventually be debt-free.  We lost so much in personal belongings, but it was absolutely worth it to be alive and well enough to enjoy life again and care for my family.  Spoiler alert: a little over 2.5 years after this all started we welcomed another baby into our family.  That was something I did not at all think would be possible even before getting sick, but not only did I heal my body from where it was, I was able to live so much healthier and stronger having learned what I did about environmental toxins and nutrition, that my body was able to support a full-term pregnancy. See, beauty from the mess. It is possible for you too, whatever your mess is right now, push through it and get ready to embrace the beauty that God has ahead for you.

I often did, and still do, think of the bible verse about not storing up our treasures on Earth.  I decided that if I have the Lord, my family, and my health, I have all that I need.

 “Do not store up for yourselves treasures on earth, where moth and rust consume and where thieves break in and steal; but store up for yourselves treasures in heaven, where neither moth nor rust consumes and where thieves do not break in and steal. For where your treasure is, there your heart will be also”

Matthew 6:19-21 NRSV

This next one is crucial, and I wanted to make it step 1, but removing Mold, rather than masking it (painting over, etc.) is so important that it got first place.

  1. Support Your Body’s Detoxification (detox slowly, and with a doctor’s help):
  • Hydration: Drink plenty of filtered water to help flush out toxins.

Avoid other types of drinks right now, including coffee. Unfortunately, this means even plain black coffee. Did you know that the majority of coffee tests high for mold? According to LifeBoost’s blog, 99.1% of coffee beans are covered in mold. You do not want to add more toxins to your bucket as you are trying to heal.  Later on, when you are feeling well again, and if you decide that you do want to consume a cup of coffee occasionally, I recommend LIFEBOOST for brewing at home. They use specialty beans that are non-GMO, mycotoxin-free, and chemical-free.

  • Nutrition: This was the biggest immediate needle pusher for me. Focus on a whole foods diet rich in antioxidants and anti-inflammatory foods. Cut out ALL GLUTEN, DAIRY, AND SUGAR.  Yes, I felt what you are feeling right now too, so what can I eat?  Our gracious God put so many good foods on this Earth for us to enjoy.  I did the Institute for Functional Medicine’s Elimination Diet for several months (it was suggested to start with 4 or 6 weeks, but I felt so great eating this way that I kept at it). Now today I still focus on consuming fruits and vegetables and quality meat.  If food has a barcode on it or comes in a box, it more than likely will not support your body’s healing properties and give you adequate nutrition.  I know, some produce has a barcode, but I hope you get what I’m saying.  If it’s the right season, visit your local farmer’s market for fresh food and inspiration.  Plant a garden if you are able, the time outdoors will be good for you too.
  • Supplements: This will vary greatly depending on your own body, this is an ask your doctor first section!  For my body, my doctor and I decided on supplements like vitamin D3 with K2, EPA-DHA fish oil, a multi-strain probiotic, a quality multivitamin, magnesium glycinate before bed, Biocidin, glutathione, I-3-C, digestive enzymes, and GI Detox (activated charcoal to bind and remove toxins).  It is important that you work under the guidance of your healthcare provider to create your own battle plan, rather than mimic what worked for my body.
  • Saunas: Regular sauna sessions can help promote detoxification.  When I was first sick, I was way too sick to even consider leaving the house to sit in a sauna uptown, so I had to find other ways to sweat out toxins.  Eventually, when we were able and I was strong enough, we bought a personal Therasage Sauna to use in our home.  This helped me to sweat out toxins and use red light at the same time, it was, and still is, very efficient.
  • Exercise: Gradually increase physical activity as you are able.  This is so good for your lymphatic drainage.  If you aren’t familiar, basically the lymphatic system is a part of your immune system and deals with the fluid of the body.  When your body isn’t moving enough this can cause a build-up that causes swelling and creates a problem.  I started with slow gentle movements and stretching, even a walk around my neighborhood was too much for my body to begin with.  I bought a vibration plate to help move lymph fluid and help me to regain some muscle tone, as I had become quite weak.  A small trampoline for walking on indoors was helpful to me as well.
  1. Manage Symptoms:
  • Rest: Prioritize sleep to allow your body to recover. At first, I was so amped up, but then would crash. When I finally came down from the high of the dental anesthesia reaction I was tired all the time from what my body went through. As a mom, I still wanted to stay up and get done all that I could each day during the quiet evening hours when my kids wouldn’t see me struggle so hard to do basic tasks. I had to intentionally set an alarm and force myself to go to sleep, and another alarm to wake up and get out of bed each morning.  Because my body was so misaligned at the time I needed to reprogram my circadian rhythm. I did this by waking up and spending about 15 minutes on our deck to get morning sunlight on my eyes first thing.  This helps with the body’s natural melatonin production which makes it easier to sleep at night when the time comes.

  • Stress management and soul care: Practice relaxation techniques like square breathing, journaling, and praying.  Delegate what you need to: mold sick or not, you do not need to be doing everything alone.  We are created to live in community with others.
  1. Environmental Controls: Do what you can
  • Air filtration: Use HEPA air purifiers to improve indoor air quality.  I have used a few different brands and have some YouTube videos where I explain how to use them, why we do, etc. You can find those here, here, and this last one here is where compare 3 different brands/styles. I also have a video we made for the duct cleaning company where my husband and I share our experience with them.  Things to look for, avoid units that emit ozone, which can be hard on the lungs, and check the CADR (clean air delivery rate).  You want lots of air exchanges per hour, so be sure you have the correct size of unit for the space you are purifying.  This was a big investment for us, so we started with one air purifier that my husband would move to the bedroom at night, and then the living room during the day.  Once we knew it was helping and we were able to afford it (remember mold rocked our finances something fierce) we purchased another. Now today we have them in every bedroom of our home, and the two living rooms.
  • Mold prevention: This is a key step that I didn’t understand before getting sick.  We built our home when I was 19, and knew nothing about true home ownership and responsibilities.  It’s important to reduce humidity in your home and address any water leaks promptly. While we didn’t have water leaks, we did have high humidity, which I didn’t know until I bought a smart hub and humidity/temperature sensors to place around our home.  Our home was built so tight that it didn’t allow for much airflow, which coupled with the HVAC system not draining correctly was a bad combo.
  • Personal care products: Choose non-toxic personal care products to minimize chemical exposure.  All toxins in and on your body add to that body burden, mold or not.  I opened the bathroom garbage and chucked anything toxic, and it was a lot, even though I had swapped many of our products out previously. Yes, I had paid money for these things, but they were not supporting me, and knowing what I did about toxins, I didn’t want to pass them on to anyone else either.  Nail polishes, hair care, lotions, it all went.  As a result, I was able to replace those products with things that had a smaller footprint (hello, shampoo & conditioner bars) and were better for my body (fewer ingredients, no artificial scents).  I had already been using a nontoxic makeup, so thankfully there was not much to mess with in that area.
  1. Medical Support:
  • Functional medicine doctor: I know I already said this but in case you are hindered by the cost and want to skip this step, please do consider consulting a functional medicine practitioner who specializes in mold illness.  You can tell them upfront you want short visits and a transcript of your conversation or notes and action items typed out if that is helpful for you. I know mold can cause brain fog, so do not be hesitant to write down all that you need to during your appointment.
  • Testing: Undergo comprehensive testing to assess your overall health and identify any underlying imbalances.  Ugh, you guys, everything that could’ve come out of my body was tested, stool samples, blood samples, urine samples, I even swapped my nasal passages and sent off a sample to be evaluated.  It all helped paint the picture of what I was dealing with, what my body was holding onto, and where.  If you know you have mold in your environment, I would say focus on decluttering and diet and save some money on testing for now.  If you came here, there is a good chance it is already causing you problems and you can skip some tests for the sake of assumption and taking steps towards remedication and healing.

During this time I did a Comprehensive Food Sensitivity Test from EverlyWell, which I ordered from Amazon. That was so eye-opening to me about what foods may be triggering some of the symptoms in my body.  I had already been keeping a food journal and trying to document how I felt after meals.  Through this test, I discovered 6 things I had been eating and cut those out. I noticed an immediate relief both digestively and with some respiratory problems.  My husband did the test later and had 29 intolerances! Avoiding those helped improve his mental health greatly.  The OCD he had struggled with since childhood suddenly became manageable, and nearly non-existent.

  • Personalized treatment: Develop a tailored treatment plan based on your specific needs, be patient as you wait for results, and be open to changing things up if you are not seeing progress.

Additional Tips

  • Patience: Recovery from mold illness can take time, but relief can also come quickly if you are following a good diet, and avoiding mold. Be patient with yourself and celebrate small victories.  This is so important. Set goals for yourself too.  I had set a ridiculous goal when I was bed/couch-ridden that I would stand up and dance for one whole song during a live-at-home Phil Wickham concert, AND I DID.  It was a small win, but it was huge for my family and I. I was able to set more small goals like that and begin spending more time standing.  I pray you are not in the same debilitating state I was, so consider where you are physically, and set goals that will guide you to improvement.
  • Support system: Connect with others who have experienced mold illness for support and encouragement.  There are some Facebook groups that were helpful to me.  I will remind you that everyone’s journey looks different, so do not be overcome with fear as you read stories from others who had to abandon their homes or literally discard every single item that wasn’t glass or metal.  I did work through counseling with a friend to help improve my mental health and keep me rooted in Christ and grounded as my world was falling apart.
  • Avoid triggers: Identify and avoid triggers that worsen your symptoms.  I could walk into a room, or touch a book and know it was going to create a symptom in my body, so I avoided a lot of places, and still do for the sake of avoiding toxins.  Our local dollar store has such a strong plastic smell that I visit it less than twice a year, whereas prior to being mold-sick I would browse there for fun.  Now when I leave the store I can smell the airborne chemicals and toxins on my hair, and choose to avoid that. I guess that has been saving us money. Ha!  You gotta look at the bright side!
  • Educate yourself: Learn as much as possible about mold illness to empower yourself.  It can feel like information overload at first.  It’s okay, take note of what you think you need, and discard the rest.  If there is something you need to know, I believe God will lead you back to it again.
  • Spend time outdoors: Getting outside each day can be beneficial for overall well-being and may help reduce exposure to indoor pollutants.

Remember, everyone’s journey to recovery is unique. It’s essential to work closely with a healthcare provider to develop a personalized treatment plan. By addressing the underlying causes of mold illness and supporting your body’s natural healing processes, you can improve your overall well-being and regain your health. There is hope for healing, even when symptoms mimic anxiety or depression.

Oh, dear friend (yes, after sharing this much of my life and talking about bowel movements, we are friends now), I just imagine the desperation you may be feeling right now and I want you to know that I believe with my whole heart that it is possible for you to overcome this.  It is my prayer that you have a tribe of people who want you better and will do what they can to get you there.  Lean on your people, and be specific when you ask for help, do you need someone to clean, watch kids, grocery shop, or meal prep with you?  Ask for what you need.

These lyrics “I don’t want to feel like this tomorrow, I don’t want to live like this today, make me feel better, I want to feel better, stay with me here now and never surrender” moved me to get better when I was in the trenches: https://www.youtube.com/watch?v=-IooCcx4c9U

Filed Under: Health and Wellness

Gluten Free Big Batch Scotcheroo Bars

August 11, 2024 by Quin Leave a Comment

2 C. Sugar
1 Bottle Corn Syrup (16oz)
1 Jar Peanut Butter (16-18oz)
12 C. Crispy Rice Cereal (Malt-0-Meal brand is gluten-free)
1 bag of Dairy-Free chocolate chips for a rich layer of chocolate on the tĂžp. Use slightly less for a thinner layer

1. Oil a 10×15 pan I like this non-toxic one from CasaWare that my mom gifted me years ago:
2. In a large saucepan, combine sugar and corn syrup over medium heat. Stir until the sugar dissolves,
3. Quickly take it off the heat and mix in peanut butter. I love that you don’t need to measure this sticky deliciousness, just scoop it all in,
4. Once it’s all combined add in the crispy rice cereal until it’s well coated.
5. Next push the mixture into the oiled pan. The firmer you pack it in the better your bars will stay together.
6. Melt Chocolate over a double boiler and pour it over the bars and spread it evenly with a rubber scraper
7. To help the chocolate set put the pan in the fridge to cool for 30-45 minutes. Set a timer, because if they stay in too long the bars will get hard.

Yummy Big Batch Scotcheroo Bars

Print Recipe
Ingredients Method

Ingredients
  

  • 2 C. Sugar
  • 1 Bottle Corn Syrup 16oz
  • 1 Jar Peanut Butter 16-18oz
  • 12 C. Crispy Rice Cereal Malt-0-Meal brand is gluten-free
  • 1 bag of Dairy-Free chocolate chips for a rich layer of chocolate on the tĂžp. Use slightly less for a thinner layer

Method
 

  1. Oil a 10×15 pan I like this non-toxic one from CasaWare that my mom gifted me years ago:
  2. In a large saucepan, combine sugar and corn syrup over medium heat. Stir until the sugar dissolves,
  3. Quickly take it off the heat and mix in peanut butter. I love that you don’t need to measure this sticky deliciousness, just scoop it all in,
  4. Once it’s all combined add in the crispy rice cereal until it’s well coated.
  5. Next push the mixture into the oiled pan. The firmer you pack it in the better your bars will stay together.
  6. Melt Chocolate over a double boiler and pour it over the bars and spread it evenly with a rubber scraper
  7. To help the chocolate set put the pan in the fridge to cool for 30-45 minutes. Set a timer, because if they stay in too long the bars will get hard.

Filed Under: Recipes

It’s Not Too Late to Homeschool

July 31, 2024 by Quin Leave a Comment

Eleven years ago, as the new school year loomed, we made a leap of faith and decided to homeschool our kids.

It was literally right before the school year started, after teachers had already been assigned and backpacks were purchased and filled.

Chad and I prayed together and decided that we were going all-in, at least for the next semester as a trial run.

Carter had already been “play schooling” at home since he was 3, but he was now compulsory age in our state (ages 6-16), and we needed to make an official decision.

If we could have sent him half days I maybe would have, but he’d be riding a big bus and be gone all school day, ever week day. He was advanced for his age, he had started reading at 3, and was hyper active. I worried he would get bored easily and be labeled as a troublemaker in the public school setting.

We had already experienced one of Mady’s teachers insisting she be medicated for her behavior- we didn’t.

I knew Carter would truly need more freedom to move around and frequent subject changes. We could easily do that with homeschooling.

We had spent the last 2 years using homeschool curriculum with Mady in the evenings and on weekends to try to catch her up, because she had trouble learning the way the material was being taught in school.  She was a sweet girl, she just couldn’t comprehend and retain information as it was being presented, the disappointment and scolding from a couple of her teachers changed her disposition in a negative way. We had countless meetings with her teachers over the years and they did all that they could with what they had available. At the time there wasn’t official school support for dyslexia.

It just made sense to bring her home, and I have had zero regrets about it.

People asked as we got towards high school if we would send her for the last 4 years. Absolutely not, emotionally speaking homeschool was best in that season too.

The unhurried lifestyle we’ve been able to adopt as a result of homeschooling has been the biggest blessing in so many changing seasons of life.

Being able to focus on each child’s interests and cater to exactly what they need each day has helped them to grow into the amazing and unique people they were made to be.

I know homeschooling isn’t for everyone, as not everyone has the ability or desire, but if you’ve ever questioned if it’s right for your family, I encourage you to explore it.

Home educating been the greatest gift for us, offering flexibility, personalized learning, and the chance to build a strong family bond with emotionally intelligent children.

I’m telling you this because just in case God is putting this desire on your heart I want you to know that you can do it. You don’t have to do it all the way through and you don’t have to do it alone. You can start small, just the first semester, and then reevaluate how things are going at the mid-year mark. Join a co-op with other homeschool families if you want a little more support.

If a small voice in your head makes you worry about all that your children will miss out on, think about all that they will GET TO experience. Also, from a snarky but true standpoint, I have a whole host of stories I could tell you about things I’m glad my younger kids “missed out on” that my oldest had to experience in the public school system.

Homeschooling has been an incredible journey. We’ve had the privilege of watching our children grow into confident, curious individuals.

I appreciate that my children get to wake up when their little bodies are ready (usually between 5am and 7am, but sometimes someone needs to sleep until 8am and that’s okay).

We enjoy three slow nutritious meals together each day, lots of reading, and plenty of creative play time. We encourage our kids to start their own businesses and add to their savings accounts while learning valuable life skills.

This is getting long, sorry, I really just wanted to say, it’s not too late.

You can start homeschooling anytime. You don’t need the perfect curriculum, because it doesn’t exist. I suggest starting with a Bible, a few notebooks, a library card, and a positive attitude.

Filed Under: Homeschool

  • 1
  • 2
  • 3
  • …
  • 22
  • Next Page »

Welcome!

Categories

  • All The Posts (196)
  • Celebrate Absolutely Everything (48)
  • Encouragement (21)
  • Gift Guides (10)
  • Health and Wellness (13)
  • Homemaking (66)
  • Homeschool (32)
  • Marriage (6)
  • Parenting (61)
  • Recipes (33)
  • Thanks (4)

Copyright

Feel free to share links from A Slightly Better Life as long as they’re used in a kind, respectful way and proper credit is given. I ask that you include a link back to this site when you share, not copy the text.

All content is owned by Quincey B. and may not be republished elsewhere without permission.

Pinning to Pinterest? Sharing to Facebook or Instagram? Absolutely – and thank you!

Disclosure

As an Amazon Associate, I earn from qualifying purchases. This site contains affiliate links, which means I may earn a small commission if you click and purchase, at no extra cost to you. Thank you for supporting A Slightly Better Life!

Copyright © 2025 ¡ Foodie Pro Theme on Genesis Framework ¡ WordPress ¡ Log in