• Welcome
  • Health and Wellness
  • Homemaking
  • Recipes
  • Shop
  • Homeschool

Baked French Toast

January 8, 2015 by Quin Leave a Comment

Once in a while I realize we have an abundance of bread in the house.  With three kids and a husband who eat sandwiches each week this this doesn’t happen often, but when it does, I know just how to use it up!

Baked French Toast!

Top 2 reasons why I bake my French toast vs. making it the traditional way:
1.     It takes so long to make traditional french toast for a big family.
2.    When I bake it, the whole thing is ready at once.  We can all sit down and enjoy hot food together.
That’s it, those are my only reasons.

Now I’m sure I don’t need a disclaimer here, but if you’re wondering, this is NOT a healthy mama kind of meal, as many of my recipes have been.  It is one that my family loves, and that I delight in serving for brunch or breakfast when we have company for those meals.

It warms the soul, fills the belly, and leaves everyone smiling.  You’ve gotta keep some recipes like that in with your arsenal of kitchen tricks.  It’s in the housewife’s rule book.  Sorry, I can’t remember the page number, but  I’m sure it’s in there.  Hey, where is my copy of that book anyway? ha!

I compiled this recipe a few years ago, after trying a few others and not quite finding “the one”.

Since we’ve been eating healthier and cut way back on our sugar, I’ve found this Baked French Toast to almost be too sweet.  BUT be warned, if you try to cut almost all of the brown sugar out and serve it to your honest friends who eat a typical American diet on the daily, you’ll quickly realize you need to put the sugar BACK in when serving to company.  Alright, you’ve been warned- nothing more I can do for you but tell you to just enjoy this.  You can eat healthy again in 3 hours, deal?

It’s good y’all.  Real good. I promise you!
::Preheat your oven to 350 degrees:: & lets get started! (if you’re impatient like I am, scroll to the bottom for the printable version).
First, you melt the butter and brown sugar.
Cook it low & slow, so it doesn’t burn, and because it makes the clean up easier
It’ll begin to look like this.
Spread that mixture in a 9×13 pan & add a layer of bread over it.
Mix up your milk, eggs, and vanilla.
Get it good and soupy like.
Pour part of that over the first layer of bread.
Add another layer of bread.
Pour the rest of the milk/egg/vanilla mixture on the top of
it all.
Layering & soaking the bread is the trick here.
Cover the top of your pan with foil.
 Bake it for 45 minutes!
(remove the foil for about the last 15 minutes, to help it brown up a bit).
Here are some things you can do while you wait for this yummy goodness to
cook:
Unload the dishwasher
Or commission a kid to do it. 🙂
Kindly ask that same kid to get the dishes ready.
Stare at the oven about a hundred times.  Glance more often as the aroma fills the house and you wonder if the eggs are still raw, or if you could just snatch one tiny little bite.
Admire your kids coloring so well together.  Then gently scold the youngest for laying on the table and the oldest for sitting in the high chair! haha.
When it’s time to dish up, flip each piece of French toast
upside down on the plates.  It looks more
impressive that way.  Enjoy!
The condensed version- AKA- The part where you can print and stash in your kitchen cupboard.

Filed Under: All The Posts, Recipes

Recipe: Warm Coconut Cream Cheese Goo

December 4, 2014 by Quin Leave a Comment

I <3 warm satisfying sweets on cold wintery days.
This has been my go-to when I’m craving something nectarous & savory.
In a skillet, warm these things together until you can easily stir them up (don’t worry about measurements, just use your own judgment):
Shredded Coconut
Cream Cheese
Almond Flour
Peanut Butter
Chocolate Chips
A little water
Oatmeal- I don’t usually add this, unless I share with the kids, then I throw it in to bulk it up.
Does it look totally gross?  You betcha.  But TRUST ME, it tastes AMAAAAAZING.  How could you go wrong with coconut and chocolate?  You just can’t!

Filed Under: All The Posts, Recipes

Delicious and Easy Pumpkin Dump Cake Recipe

November 26, 2014 by Quin Leave a Comment

This is right before it went in the oven- when I realized it didn’t have the sugar!
Pumpkin Dump Cake Recipe
Ingredients:

1 box cake mix (yellow or spice)

1 (15oz) can Pumpkin

1 (12oz) can Evaporated Milk

3 Eggs

1 C . Sugar (white or brown)

1 tsp. Cinnamon

½ tsp. Salt

1 ½ C. Pecans or Almonds- Chopped

1-2 Sticks of Butter- Melted

Mix the pumpkin, evap. milk, eggs, sugar, cinnamon, &
salt together.
Pour that creamy mixture into a 9×13 cake pan.
Sprinkle the cake mix over the top.
Drizzle butter over the cake mix.
Sprinkle nuts over the whole she-bang.
Bake at 350* for 50-55 minutes.
This recipe is pretty fool-proof.  This is good, since I don’t always read every
step.  Like today, when I completely left the sugar out of one pan.  My dad is diabetic; I could say I did it on purpose and just serve it to everyone else with a scoop of ice cream.

Filed Under: All The Posts, Recipes

Homemade Peanut Butter

June 24, 2014 by Quin Leave a Comment

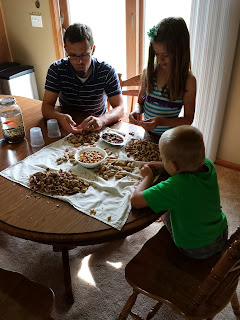
We stopped in for a visit with my dad (AKA Grandpa) over the weekend.  He sent us home with two baggies of peanuts.  One for the kids, one for their daddy.
Well the kids and daddy put theirs together and here is what they made!
By the way, I am loving my $30 food processor from Amazon. Thank you to everyone who chimed in over on my facebook when I asked about them!  I didn’t want anything too big & fancy yet, as I am admittedly a bit of a kitchen utensils/supplies hog and am running out of room for all this stuff!
Also, I wasn’t really sure how much I was going to actually use it!
In the past we have made our peanut butter with a mortar and pestle. That method works REALLY great and is surprisingly, therapeutically fun!  These days however, I just have no time for that.
Simple steps:
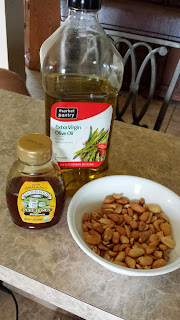
1. Dump Peanut Butter, Oil & Honey into the food processor.
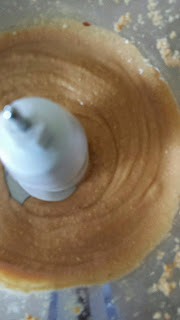
2. Turn it on and run it until you get to your desired creamy texture.  I didn’t measure at all, I’m sorry.  Just go with your gut.  It’s best to start with a little oil and add in more if needed.
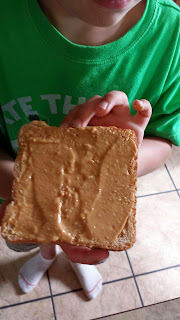
3. ENJOY!
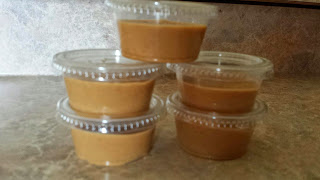
I stored the leftover in a mason jar in the fridge & put some into
these little plastic containers for my husband to snack on at work.

Filed Under: All The Posts, Recipes

In The Kitchen: Homemade Hummus

June 4, 2014 by Quin Leave a Comment

Twice last week I ate meals with friends who brought hummus to share.  Mmm-mm-mmm.  Good food & good friends.  MY Fav.  I had made hummus a few years ago, then I kind of forgot about it.

It isn’t too expensive to buy, but I enjoy making things myself.  When I’m able.  But more honestly, when I feel like it! 🙂
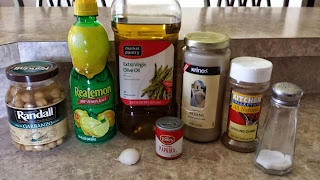
Here’s the ingredients I used based on the back of the package, and several other blog posts with recipes that I sorted through:
  • One 15-ounce can chickpeas or garbanzo beans (I learned that these are basically the same thing, so find either one and you’re good to go)
  • 1/4 cup lemon juice
  • 1/4 C. tahini (I found this at Fareway, it was $6.99, I am almost certain it has got to be cheaper somewhere else. This was the first time that I had actually seen it, so I bought it. It was next to the peanut butter . This makes sense because all it is is ground sesame seeds.  You could probably actually make your own if you had a good food processor and a whole bunch of sesame seeds, I had neither… hence the $7 I forked over)
  • Garlic, I imagine whatever you have on hand will probably work. fresh or powder would be best.
  • 2 tablespoons olive oil
  • A dash of salt, or not.  I can’t really remember if I put this in.
  • 1/2 teaspoon ground cumin, or a full teaspoon if you got busy talking with your kiddos and didn’t pay any attention to your recipe while you were scoopin’ until after the second scoop.  Not that I would do that or anything… (But if you do, it still turns out just fine!)
  • 2 to 3 tablespoons water
  • A dash of paprika for pretty

I tried crushing it all up in my mortar and pestle, but that got old real quick, so I transferred it all to the blender and blended a little at a time while stirring until it was smooth.  I really need to get a food processer, but since I don’t have one yet, this worked just fine.  I did all this with my sweet kitchen helper, my oldest daughter.  She’s 11, and like me, she LOVES all things cooking, baking, and homemaking.

Filed Under: All The Posts, Recipes

In The Kitchen: Living Salad Bowl

June 4, 2014 by Quin Leave a Comment

Having a living salad bowl on my deck is just about my favorite thing right now.  It makes lunch time so easy!  It’s also a great way to add simple veggies to dinner.  My biggest high comes from seeing my picky eater snacking on it while he plays outside.
In each pot I planted:
Green leaf lettuce
Red leaf lettuce
Baby spinach
Green onions
I have another pot with basil (yummmmm) it has a plant in the center and seeds scattered around the rest that will hopefully grow soon.
After years of wanting to grow my own lettuce, I’m so glad I finally did it!

Filed Under: All The Posts, Parenting, Recipes Tagged With: Parenting, Recipes

In The Kitchen: Go-To Potluck Recipe

March 7, 2014 by Quin Leave a Comment

Between having both sides of our family living close by and being Lutheran, we host and attend a lot of potlucks! 
I’d say for sure one a month, and through the summer even more.
Commonly on a potluck day I’m standing in the kitchen (an hour or two before it’s time to leave), phone in hand, staring at this screen:
The “easy last minute recipes” always require way more time than I have to spare. 
Almost every single time, I end up settling on making one of two things: A veggie tray OR a meat, cheese and cracker tray.  Both always go over well and disappear quickly. 
No longer will I feel like I’m settling. Once I hit publish this will be an official recipe, and that’s totally acceptable for a Lutheran potluck. 😉
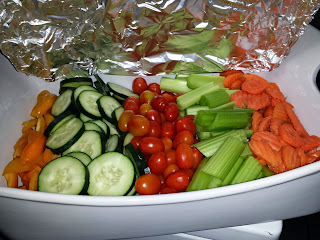
This week for our Fat Tuesday celebration at church I took this big veggie tray & a small dip.
I used my mandolin slicer, a small cutting board and a knife.  Using a minimal amount of dishes/utensils makes clean up a snap! 
This one had:
Cucumbers
Sliced Carrots
Sweet Mini Peppers
Cherry Tomatoes
Celery
With the dip, it cost me just under $10. 
I also did a quick cheese and cracker tray that made it to the van before I could photograph it.

Filed Under: All The Posts, Recipes

Recipe: Yummy Water!

March 2, 2014 by Quin Leave a Comment

Water is a big topic at our house.
I manage to drink plenty, but I don’t always enjoy doing it.  Different types of water have different
flavors to me.  Some of them make me down
right nauseous.  I’m not a big soda drinker either, but I do love me some black tea or coffee.  mmm-mmmmm…
Sun tea!
If you’re looking to drink more water, give this a try!
You can cut your cucumber and lemon with a sharp knife.  I personally LOVE using my mandolin slicer.
Tangerine is great in water too!
We love our Camelbak bottles.  I had admired a few different friends using them before I finally bought them for our family.  Now we’ve also been buying them for gifts too!  They’re easy to clean and replacement parts if you need them, are cheap.
When we go on day trips I bring along a gallon jug of water to refill our bottles.
What do YOU like to add to your water?  

Filed Under: All The Posts, Recipes

DIY Table Top S’mores

June 5, 2012 by Quin Leave a Comment

Last night we made Table Top Driveway Smores.  I had everything on hand already except the charcoal and the pot.

Driveway S’mores
Being impatient we roasted some while there was still a little flame, this makes deliciously burnt mallows. 😉
The Basics.  I think this bag of charcoal will last us all summer, and then some!
Update: 6 years later, we’re still using the same bag!

What you’ll need:

  • Terracotta pot
  • Tin Foil
  • Charcoal
  • Dryer Lint Lighter fluid
  • Lighter
  • Skewers (pokey things for roasting the mallows on)
  • S’mores fixin’s

First I made a ball of tinfoil to put into the pot (about softball sized).  This way the pot wasn’t so deep.  Then I lined the pot with another piece or two of tinfoil.

Next, I added about 5-6 pieces of charcoal along with a little dryer lint to start the fire.  This wasn’t successful, so I resorted to lighter fluid (back up when you squirt this on-  It really works fast! Be so safe with this, please)

The coals will get hot while the flame goes down, then you will have flameless table top s’mores!
Much safer for little people, although it is still crazy hot up close, you won’t have to be quite as paranoid about the flame catching their clothes on fire (maybe that’s just me that worries about that), or burning little hands if the wind comes along.

The heat of the coals is enough to roast your marshmallows, and I’ve read the pot gets hot enough to melt whatever it’s on- that’s why we chose the driveway for this.  You could also put it into a stoneware bowl or something if you wanted it on a table outdoors.

The original pot of 5-6 coals stayed hot enough to roast on for at least 3 hours.  After that we just called it a night, we maybe could have gotten more time out of it, but we were exhausted from being out all day!

Best of all-  Our clothes didn’t stink like smoke when we were done!  Yeah!

Go on, try this out and make some memories with your precious family!

Filed Under: All The Posts, Celebrate Absolutely Everything, Homemaking, Recipes Tagged With: Celebrate Absolutely Everything, Homemaking, Motherhood + Homemaking, Recipes

Recipes: Organizing

March 2, 2012 by Quin Leave a Comment

I mostly just pull my recipes from the internet these days. Somtimes it’s something great I see on pinterest other times it’s something I’m craving (or saw on TV & had to have) so I Google how to make it and use which ever recipe seems easiest.

There are times that I taste what I’ve made and I JUST TOTALLY LOVE it, occasionally even the little people here love it too (praise the man of the house, he never complains about what I make)! So I have decided that some recipes are so worthy & that I must make them at least one more time while I’m on earth. Those recipes get added to my little index card recipe collection.

I also have a 3 ring binder filled with my grandma’s recipes, I love that binder & all the wonderful recipes inside. I am so honored to be able to make the things she made and hopefully someday my children will be using thoes same recipes in their kitchens.

What do you do with your favorite recipes?

Filed Under: All The Posts, Homemaking, Recipes Tagged With: Homemaking, Motherhood + Homemaking, Recipes

  • « Previous Page
  • 1
  • 2
  • 3
  • 4
  • Next Page »

Welcome!

Categories

  • All The Posts (196)
  • Celebrate Absolutely Everything (48)
  • Encouragement (21)
  • Gift Guides (10)
  • Health and Wellness (13)
  • Homemaking (66)
  • Homeschool (32)
  • Marriage (6)
  • Parenting (61)
  • Recipes (33)
  • Thanks (4)

Copyright

Feel free to share links from A Slightly Better Life as long as they’re used in a kind, respectful way and proper credit is given. I ask that you include a link back to this site when you share, not copy the text.

All content is owned by Quincey B. and may not be republished elsewhere without permission.

Pinning to Pinterest? Sharing to Facebook or Instagram? Absolutely – and thank you!

Disclosure

As an Amazon Associate, I earn from qualifying purchases. This site contains affiliate links, which means I may earn a small commission if you click and purchase, at no extra cost to you. Thank you for supporting A Slightly Better Life!

Copyright © 2025 · Foodie Pro Theme on Genesis Framework · WordPress · Log in